
Gryphon spent years building custom suits privately for their own sponsored racers. They now build them for anyone, which is a bigger deal than it sounds — a genuinely custom, measured-to-you race suit from a Canadian company, starting at $1,600, is not a thing there are many of.
I get asked how it works, usually by a parent whose kid has outgrown a second-hand suit — and, before that, whether the armour inside it is actually up to the job. So here is the process, start to finish, from the design side.
Step 1 — Decide what you are designing
One-piece or two-piece, then one of two routes:
Bring your own design. Artwork in AI, PDF, JPG or PNG, with notes for logo placement, Pantone colours, and anything else that matters. This is where I come in — most riders do not have the artwork, they have an idea, a pile of sponsor logos in mixed formats, and no fixed sense of what goes where.
Or start from a Gryphon template. Seven pre-defined layouts on their site, each a structured panel arrangement you then choose colours and materials for. Much faster, still yours.
The templates are not the lesser option. A template with well-chosen colours and correctly placed sponsors beats a custom layout that nobody thought through.
Step 2 — Leather, by zone
Cowhide for standard durability, kangaroo for premium lightweight, or mixed. And it is not one choice for the whole suit — you select per zone: shoulders, arms, chest, back, seat, thighs, knees.
That is the part most people do not expect. Kangaroo where you want light and supple, cowhide where you want armour, in the same suit.
Step 3 — Perforation
None, light, or full, and again by zone: chest, upper and inner arms, front and inner thighs, back panel.
Worth thinking about honestly rather than defaulting. If you race in Ontario in July, you want the venting. If your season is mostly cold mornings at Shannonville, full perforation will make you miserable.
Step 4 — Colour
Defined by zone as well. Primary zones are chest, back, arms and legs; secondary are accent panels, stretch areas and logos. Either Gryphon's preset colours or your own HEX or Pantone values.
Give Pantone, not HEX, wherever you can. Leather is dyed, not printed, and a screen value is a wish. A Pantone reference is an instruction.
Step 5 — Branding and graphics
Rider name, race number, sponsor logos, and Gryphon's own mark in a minimum of two locations — that requirement is in the order form and it is fair, since they are building the thing.
Design note from having done this: put sponsor logos down the sides of the arms and legs. Track photography is shot side-on from the outside of a corner. A logo on the chest is visible to the person standing in front of you in the paddock; a logo on your forearm is in every photo of you actually racing.
Step 6 — Measurements
Download Gryphon's measurement guide and fill in every field — it has to accompany the design. Tailor-measured is preferred; self-measured works if someone competent is holding the tape.
Read their instructions before you start, because a few of them are not obvious:
- Everything in inches, with a soft tailor tape.
- Wear what you will wear under the suit. Chest protector, back protector, knee brace — all of it. If you ride with an airbag vest, have it on for the chest measurement.
- The waistline means the navel, on every measurement that references it.
- Forearm and wrist get an extra 0.79" added before you write the number down.
- Sleeve length is measured with a slight bend in the arm, to mimic the riding position, and it has to equal shoulder-to-elbow plus elbow-to-wrist. If it doesn't, one of the three is wrong.
This is the step that decides whether the suit is any good. Everything else is taste; this is fit.
Step 7 — Approve everything before it is cut
Final design mockup, material selections, perforation layout, colour confirmation. All confirmed before production starts.
Take this seriously. Once leather is cut and stitched there is no revision round. Print you can reprint; a suit you cannot.
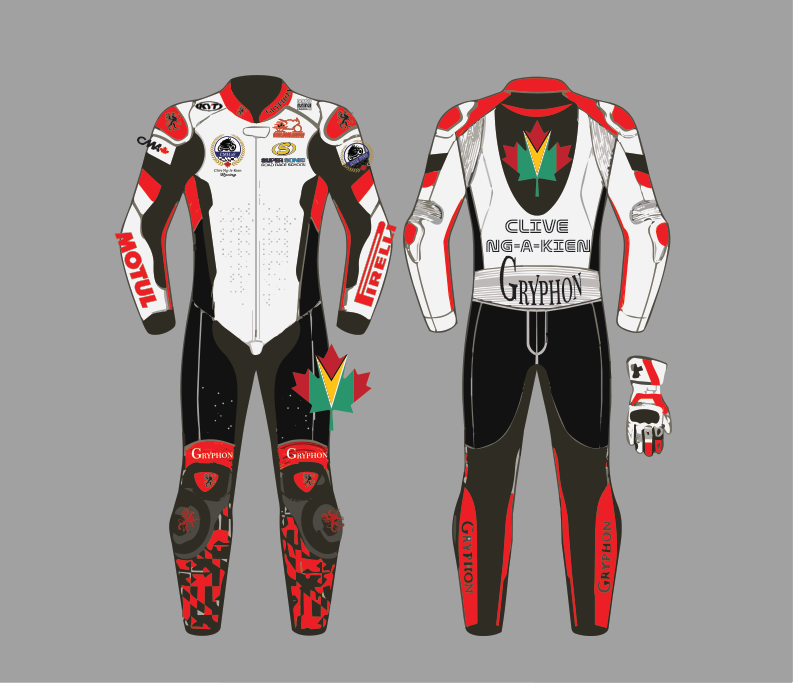
What I would tell a first-timer
Budget for the design as its own step. The suit is $1,600 and up, and the artwork is the cheap part of that — but a rushed layout is what you look at for the next four seasons.
Sort your sponsor logos before you start. Ask every sponsor for vector art (AI, EPS or SVG). A logo pulled off a website is 400 pixels wide and will not survive being printed on leather at full arm length.
Leave room. Riders pick up sponsors mid-season, and a suit with every square inch filled has nowhere to put the next one.
The current ordering details, the seven templates and both PDFs are on Gryphon's own page: gryphonmoto.com/pages/custom-race-suits.
Need the artwork side handled? I design race suits, helmets and sponsor layouts for racing programs across Ontario.